Controls
Guide
Classes
Jewels
Cards
Save/Load
Click and Drag Players
Open/Close Menu
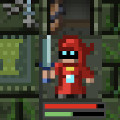
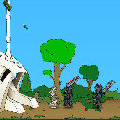
Action RPG game where 4 Stickmans defeat monsters and advance the stage!
Let's make your own party by customizing class, status and items!
You can play against world players in VS mode.
Move Drag the Stickman
Attack Fully automatic
Items Drag and drop
Pause & Option Space key

LP Life point
STR Strength
DEX Dexterity
MAG Magic
AT Min. attack: Max. attack
AGI Min. attack speed: Max. attack speed
RANGE Attack range
AURA Aura of Attack (AT), Aura of Defense (DF)
Apply to yourself and your Stickmans around
BULLET Number of additional attacks
RING Number of continuous attacks
TYPE Weapon attributes
MP Required magic for additional attacks
$$ Money you consume for an attack
TIME Time effect
SLOW Chill effect
LV Level
SP Skill point (2 points per 1LV)
EXP Experience point
$$$ Money
FP Fighting power (FP = LV + WEAPONx2 + COMPO + COMPO)
Revival Pay and join to the game again

Compo Item:Items to combine with a weapon (COMPO) by overwriting

There is a town at the starting point.
You can complete a stage by defeating a boss.
The game is over when all Stickmans have been killed.
Boxer
  • In proximity, attacks on a single enemy is good
  • LP: Life point
  • STR: Attack
  • DEX: Attack speed
  • MAG: Additional attack
Gladiator
  • In proximity, and cut into multiple enemies at a time
  • LP: Life point
  • STR: Maximum Attack Power
  • DEX: Minimum Attack Power
  • MAG: Additional attack
Sniper
  • At long range type, no problem also attack to the floating body
  • LP: Life point
  • STR: Attack range
  • DEX: Attack
  • MAG: Additional attack
Magician
  • I manipulate the magical attack in a variety of ways
  • LP: Life point
  • STR: Attack range
  • DEX: Attack speed
  • MAG: Attack
Priest
  • It excels to support the fellow, but weak attack
  • LP: Life point
  • STR: Aura of Attack
  • DEX: Aura of Defense
  • MAG: Aura range
Gunner
  • Dealing with powerful heavy weapons, but the consumption of money is intense
  • LP: Life point
  • STR: Attack
  • DEX: Attack speed
  • MAG: Money cost reduction
Whipper
  • It's proximity, but to crush multiple enemies with exquisite Reach
  • LP: Life point
  • STR: Attack
  • DEX: Add number of attacks
  • MAG: Additional attack
Angel
  • Class with a little habit to attack in a special way
  • LP: Life point
  • STR: Attack
  • DEX: Continuous attack
  • MAG: Additional attack
Emerald
  • Level 1:Add 0-1 poison damage. Dropped by: Red Big Skull Dragon (Grassland 3)
  • Level 2:Add 1-1 poison damage. Dropped by: Green Roundhead Walker (Seaside 1)
  • Level 3:Add 1-2 poison damage. Dropped by: Green Gel Wheel (Mist Grove 3)
  • Level 4:Add 2-2 poison damage. Dropped by: Cyan Fairy Bat (Beach 2)
  • Level 5:Add 2-3 poison damage. Dropped by: Orange Castle Snake (Snowfield 7)
  • Level 6:Add 3-3 poison damage. Dropped by: Green Big Diamond Tree (Hell 2)
  • Level 7:Add 3-4 poison damage. Dropped by: Green Box Wheel (Hell 7)
  • Composition restriction: weapons with type Poison

Peridot
  • Level 1:+1s Poison Length. Dropped by: Blue Fairy Snake (Grassland 4)
  • Level 2:+2s Poison Length. Dropped by: Green Cap Snake (Cavern 1)
  • Level 3:+3s Poison Length. Dropped by: Green Gel Bat (Mist Grove 1)
  • Level 4:+4s Poison Length. Dropped by: Orange Boss Vampire Eel (Beach 2)
  • Level 5:+5s Poison Length. Dropped by: Red Boss Roundhead Copter (Mountain 2)
  • Level 6:+6s Poison Length. Dropped by: Green Big Diamond Tree (Hell 2)
  • Level 7:+7s Poison Length. Dropped by: Brown Big Box Wheel (Hell 7)
  • Composition restriction: weapons with type Poison

Ruby
  • Level 1:Add 1-2 fire damage. Dropped by: Green Skull Dragon (Grassland 3)
  • Level 2:Add 3-4 fire damage. Dropped by: Orange Skull Stickman (Cavern 3)
  • Level 3:Add 5-6 fire damage. Dropped by: Yellow Roundhead Bat (Mist Grove 2)
  • Level 4:Add 6-9 fire damage. Dropped by: Orange Skull Spider (Beach 1)
  • Level 5:Add 8-12 fire damage. Dropped by: Grey Big X Walker (Mountain 2)
  • Level 6:Add 10-15 fire damage. Dropped by: Orange Triangle Stickman (Hell 1)
  • Level 7:Add 15-20 fire damage. Dropped by: Grey Big Diamond Germ (Hell 8)
  • Composition restriction: weapons with type Fire

Garnet
  • Level 1:+0.4s Fire Length. Dropped by: Red Fairy Snake (Grassland 4)
  • Level 2:+0.6s Fire Length. Dropped by: Orange Skull Bat (Cavern 3)
  • Level 3:+0.8s Fire Length. Dropped by: Yellow Roundhead Dragon (Mist Grove 2)
  • Level 4:+1.1s Fire Length. Dropped by: Orange Boss Vampire Eel (Beach 2)
  • Level 5:+1.4s Fire Length. Dropped by: Grey Castle Stickman (Mountain 2)
  • Level 6:+1.7s Fire Length. Dropped by: Grey Triangle Walker (Hell 1)
  • Level 7:+2.0s Fire Length. Dropped by: Grey Big Diamond Germ (Hell 8)
  • Composition restriction: weapons with type Fire
  • Note: For the Flame Sword, Flame Sabel, Inferno, and the Hell Fire the Garnet allows the flames to go further.

Sapphire
  • Level 1:Add 3-5 ice damage. Dropped by: Green Smiley Snake (Grassland 3)
  • Level 2:Add 6-10 ice damage. Dropped by: Purple Skull Bat (Cavern 2)
  • Level 3:Add 9-15 ice damage. Dropped by: Olive Roundhead Stickman (Mist Grove 3)
  • Level 4:Add 12-20 ice damage. Dropped by: White Big Vampire Fish (Beach 1)
  • Level 5:Add 15-25 ice damage. Dropped by: Blue Diamond Mushroom (Snowfield 7)
  • Level 6:Add 18-30 ice damage. Dropped by: White Triangle Germ (Hell 2)
  • Level 7:Add 21-35 ice damage. Dropped by: Cyan Triangle Snake (Hell 8)
  • Composition restriction: weapons with type Ice

Aquamarine
  • Level 1:+5% Cold effect. Dropped by: Grey X Walker (Grassland 4)
  • Level 2:+10% Cold effect. Dropped by: Pink Fairy Bat (Cavern 2)
  • Level 3:+15% Cold effect. Dropped by: White Roundhead Tree (Mist Grove 1)
  • Level 4:+20% Cold effect. Dropped by: Blue Fairy Dragon (Beach 2)
  • Level 5:+25% Cold effect. Dropped by: White Big Vampire Snake (Snowfield 7)
  • Level 6:+30% Cold effect. Dropped by: White Triangle Germ (Hell 2)
  • Level 7:+35% Cold effect. Dropped by: Pink Boss Triangle Snake (Hell 8)
  • Composition restriction: weapons with type Ice
  • Note: Increases the Slow percentage, which improves the slowing effect.

Diamond
  • Level 1:+0.1s Freeze Length. Dropped by: White Skull Stickman (Castle Gate)
  • Level 2:+0.2s Freeze Length. Dropped by: White Boss Smiley Walker (Cavern 1)
  • Level 3:+0.3s Freeze Length. Dropped by: White Roundhead Mushroom (Mist Grove 1)
  • Level 4:+0.4s Freeze Length. Dropped by: White Vampire Eel (Beach 2)
  • Level 5:+0.5s Freeze Length. Dropped by: White Boss Castle Snake (Snowfield 7)
  • Level 6:+0.6s Freeze Length. Dropped by: White Triangle Stickman (Hell 1)
  • Level 7:+0.7s Freeze Length. Dropped by: Red Boss Box Wheel (Hell 7)
  • Composition restriction: weapons with type Freeze
  • Note: This jewel has doubled buying and selling price of other jewels at LV 1 but at normal prices at other levels.

Topaz
  • Level 1:Add 0-4 thunder damage. Dropped by: Green Skull Bat (Grassland 3)
  • Level 2:Add 0-9 thunder damage. Dropped by: Yellow Skull Fish (Cavern 1), Yellow Smiley Fish (Cavern 2), Yellow Fairy Fish (Cavern 3)
  • Level 3:Add 0-15 thunder damage. Dropped by: Olive Star Mushroom (Mist Grove 3)
  • Level 4:Add 0-22 thunder damage. Dropped by: Olive Gel Dragon (Beach 1)
  • Level 5:Add 0-30 thunder damage. Dropped by: Red Roundhead Copter (Mountain 2)
  • Level 6:Add 0-39 thunder damage. Dropped by: Yellow Big Coconut Snake (Hell 2)
  • Level 7:Add 0-49 thunder damage. Dropped by: Yellow Big Box Wheel (Hell 7)
  • Composition restriction: weapons with type Thunder
Quick's Card
  • Level 1: -10% Limit AGI. Dropped by: Green Boss Skull Snake (Grassland 1)
  • Level 2: -20% Limit AGI. Dropped by: Green Boss Cap Mushroom (Forest 1)
  • Level 3: -30% Limit AGI. Dropped by: Pink Boss Gel Spider (???)
  • Level 4: -40% Limit AGI. Dropped by: Grey Boss Box Walker (Desert 1)
  • Level 5: -50% Limit AGI. Dropped by: White Boss Castle Stickman (Snowfield 4)
  • Level 7: -60% Limit AGI. Dropped by: White Boss Skull Stickman (Hell Gate)
  • Composition restriction: no restrictions
  • Effect explanation: Reduces both min and max AGI by 10%, 20%, 30%, 40%, 50% or 60%. This can reduce the AGI below the classes' AGI limit. The LV7 card usually gives a weapon 2.5× DPS.
  • Note: The LV6 version of this card does not exist. AGI values are rounded up to the nearest integer. This card was white before ver 11.4.

Long Sword's Card
  • Level 1: +5 Length of sword. Dropped by: Grey Boss Skull Bat (Grassland 2)
  • Level 2: +8 Length of sword. Dropped by: Purple Boss Cap Mushroom (Forest 2)
  • Level 3: +10 Length of sword. Dropped by: White Boss Roundhead Mushroom (Mist Grove 1)
  • Level 4: +12 Length of sword. Dropped by: White Boss Skull Zombie (Desert 6)
  • Level 5: +15 Length of sword. Dropped by: White Boss X Walker (Snowfield 1)
  • Level 6: +20 Length of sword. Dropped by: Grey Boss Triangle Tree (Hell 2)
  • Level 7: +25 Length of sword. Dropped by: Yellow Boss Coconut Walker (Inferno 2)
  • Composition restriction: Swords
  • Effect explanation: Increases length of sword and attack range. It doesn't affect the length of the elemental attack.
  • Note: If the player were to add a Long Sword's Card 3 or higher to a Wooden Sword 5, then the the sword will be the length of two swords or even more. It is also applicable with Katana's Card.

Catapult's Card
  • Level 1: +20 Length. Dropped by: Orange Boss Skull Dragon (Grassland 3)
  • Level 2: +40 Length. Dropped by: White Boss Smiley Walker (Cavern 1)
  • Level 3: +60 Length. Dropped by: Blue Boss Roundhead Eel (Submarine 3)
  • Level 4: +80 Length. Dropped by: Orange Boss Diamond Spider (Desert 4)
  • Level 5: +100 Length. Dropped by: White Boss Castle Stickman (Snowfield 2)
  • Level 6: +120 Length. Dropped by: Grey Boss Box Stickman (Hell 5)
  • Level 7: +150 Length. Dropped by: Green Boss Coconut Spider (Inferno 3)
  • Composition restriction: Bows, Orbs, Staves, Guns or Rings
  • Effect explanation: Increases the Range of the weapon
  • Note: This is a good card for the Triple Shot lineup, the Rifles, and the Long Staves, as the weapon will then achieve a huge range and potentially the entire screen at 512. It is also good for weapons with low range needing high range, like Electric Shock 5. This card was grey before ver 11.4.

Pierce's Card
  • Level 1: 25% chance of penetrate. Dropped by: Blue Boss Fairy Snake (Grassland 4)
  • Level 2: 50% chance of penetrate. Dropped by: White Boss Skull Bat (Cavern 2)
  • Level 3: 75% chance of penetrate. Dropped by: Tan Boss Roundhead Eel (Submarine 1)
  • Level 4: 100% chance of penetrate. Dropped by: Red Boss Box Tree (Desert 8)
  • Composition restriction: Bows, Orbs and Guns
  • Effect explanation: Allows the projectiles to pass through the terrain 25%, 50%, 75%, 100% of the slime.
  • Note: Made more useful in ver 2.6, with the implementation of Hill Country 1, involving mid-air platforms. It is also useful in Cavern stages. Especially effective when combined with Triple Shot or Quint Shot because of their long range. Applies to all projectiles in the same shot (e.g. for a Quad Arrow, either all four bullets gain penetration or all four don't). Combining Pierce's Card with weapons that have bonus attacks activated by touching the terrain (e.g. Volcano, Fire), is counterproductive, because the primary attacks will drop through the ground and the bonus attacks do not appear. The same can be observed for the explosion of the Bazooka, but this is not a big problem, as usually the shot hits the enemy not the ground. This card was white before ver 11.4.

Guide's Card
  • Level 1: +10 guide length. Dropped by: Red Boss Smiley Tree (Grassland 5)
  • Level 2: +20 guide length. Dropped by: Orange Boss Skull Stickman (Cavern 3)
  • Level 3: +30 guide length. Dropped by: Pink Boss Gel Spider (???)
  • Level 4: +40 guide length. Dropped by: White Boss Vampire Fish (Beach 1)
  • Level 5: +50 guide length. Dropped by: Red Boss Shield Zombie (Cavern 5)
  • Level 6: +60 guide length. Dropped by: Orange Boss Roundhead Walker (Hell 3)
  • Level 7: +70 guide length. Dropped by: Yellow Box Germ (Cavern 8)
  • Composition restriction: Bows, Orbs and Guns
  • Effect explanation: Allows projectiles to home towards an enemy within the guide length. 'Guide length' refers to the distance between the center of the projectile and its target.
  • Note: Unfortunately, most projectiles are close to be as big or even bigger than this, so they'll hit before the homing ability will apply. Because of this, for most weapons, the effect is too SMALL to be really useful. For the Volcano and the Bazooka, the guiding applies only for the projectile, and not the fire or the clouds of the explosion. It's highly recommended just to use this card on piercing weapons like Fire or Laser Guns since this will create an interesting effect. For the Fire Orb and Delta Explosion, the projectile(s) will fly around the enemy, making it useful for flying enemies, but makes it less effective for Trees. For Laser Gun, the projectile pierces through the target and will home in on subsequent enemies. It's also recommended to use this card with slow projectiles rather than fast projectiles, because the guide effect constantly affects projectiles within the guide length over time. The longer a projectile stays in the guide range, the more it is affected. Therefore, the card has very little effect on most fast projectiles, such as Thunder Storm. On the other hand, however, Thunder Spear is a fast projectile that is surprisingly effective with this card. This is mostly due to the fact that the projectiles, when stuck to the ground, will 'Slide' towards enemies in the homing radius. The Atomic Ray is very useful when combined with this card, as it is able to pierce enemies and even bounce off the ground while do large amounts of damage to groups of enemies or even single enemies. This card was white before ver 11.4.

Bullet's Card
  • Level 1: +1 bullet. Dropped by: Purple Boss Smiley Tree (Grassland 6)
  • Level 2: +2 bullet. Dropped by: Cyan Boss Gel Dragon (Seaside 3)
  • Level 3: +75% bullet. Dropped by: Red Boss Gel Tree (Submarine 2)
  • Level 4: +100% bullet. Dropped by: Grey Boss Box Walker (Desert 2)
  • Level 5: +6 bullet. Dropped by: Red Boss Shield Tree (Cavern 6)
  • Level 6: +125% bullet. Dropped by: Tan Boss Diamond Tree (Hell 4)
  • Level 7: +150% bullet. Dropped by: White Boss Skull Stickman (Hell Gate)
  • Composition restriction: Weapons which fire more than one projectile upon attack. (For full list, see table below).
  • Effect explanation: Increases the number of projectiles to the primary/secondary attack.
  • Note: This card was white before ver 11.4. The table below lists all the compatible weapons, as well as the corresponding percentage increase in damage from equipping the different levels of this card. For whips, the Whipper is assumed to have zero DEX. If the Whipper has DEX, then the additional bullets from DEX are added before they are added or multiplied with the bonus from the Bullet's Card.

Explosion's Card
  • Level 1: 25% chance of Explosion damage. Dropped by: Orange Boss Smiley Wheel (Grassland 7)
  • Level 2: 50% chance of Explosion damage. Dropped by: Grey Boss Roundhead Snake (Seaside 2)
  • Level 3: 75% chance of Explosion damage. Dropped by: Grey Boss Mask Fish (Submarine 4)
  • Level 4: 100% chance of Explosion damage. Dropped by: Orange Boss Diamond Snake (Desert 7)
  • Composition restriction: Gloves, Bows, Guns or Rings
  • Effect explanation: Splash damage is dealt to SURROUNDING enemies. The splash range is the same as the hitbox of the attack.
  • Note: The splash range of this 'explosion' can vary greatly between weapons.

Critical's Card
  • Level 1: 25% chance of AT +100%. Dropped by: White Boss Skull Stickman (Castle Gate)
  • Level 2: 25% chance of AT +150%. Dropped by: Grey Boss Roundhead Walker (Seaside 1)
  • Level 3: 25% chance of AT +200%. Dropped by: Olive Boss Star Tree (Mist Grove 3)
  • Level 4: 25% chance of AT +300%. Dropped by: Yellow Boss Diamond Cactus (Desert 3)
  • Level 5: 25% chance of AT +400%. Dropped by: Red Boss Shield Bat (Cavern 4)
  • Level 6: 20% chance of AT +600%. Dropped by: Blue Boss Gel Mushroom (Hell 6)
  • Level 7: 15% chance of AT +900%. Dropped by: Brown Boss Box Germ (Blood Lake)
  • Composition restriction: Gloves, Bows, Swords, Guns, Whips or Rings
  • Effect explanation: Has a chance to increase the base AT of the weapon by listed damage multiplier.
  • Note: Like the Pierce's Card, either everything increases damage, or nothing increases damage. This card does not affect elemental attacks. Critical's Card is stronger on average, but less reliable than Yellow Crystal, with the level 7 variant giving 2.35× DPS on average. This card was white before ver 11.4. For Angels, the Critical's Card effect can be triggered (n+1) times on the nth EXTRA RING thrown by Angels with more than 1 ring. For example, with a Critical's Card 7, a hit from the 2nd ring will have 72.25% chance (0.85×0.85) of dealing normal damage, 25.5% chance (2×0.85×0.15) of dealing 10× damage and 2.25% chance (0.15×0.15) of dealing 100× damage. This was first considered a bug which was fixed in ver 9.6, but the bug reappeared in the HTML5 versions since ver 15.9, and was later confirmed to be kept as a feature by ha55ii.

Berserk Card
  • Level 1: AT +50% DF -50%. Dropped by: White Boss Smiley Snake (Hill Country 3)
  • Level 2: AT +100% DF -100%. Dropped by: Tan Boss Star Stickman (Seaside 4)
  • Level 3: AT +150% DF -150%. Dropped by: Orange Boss Roundhead Tree (Mist Grove 2)
  • Level 4: AT +200% DF -200%. Dropped by: White Boss Box Stickman (Desert 5)
  • Level 5: AT +250% DF -250%. Dropped by: White Boss Castle Dragon (Snowfield 3)
  • Level 6: AT +300% DF -200%. Dropped by: White Boss Triangle Walker (Inferno 1)
  • Level 7: AT +350% DF -200%. Dropped by: Brown Boss Box Germ (Blood Lake)
  • Composition restriction: Gloves, Swords or Whips
  • Effect explanation: Increases damage dealt to enemies by this character, but also increases damage received by this character from enemy attacks.
  • Note: This card was added much later than the other types of cards; it was added in ver 4.9. It stacks with the Priest's Attack Aura, but doesn't affect the Priest's Defense Aura, and creates a red aura around the equipped character even when not in presence of a Priest with an Attack Aura, if any. It will increase damage received by equipped character, even if the character has 0 defense.

Big Card
  • Level 1: 50% Attack range. Dropped by: White Boss X Walker (Hill Country 1)
  • Level 2: 100% Attack range. Dropped by: Grey Boss Roundhead Walker (Seaside 1)
  • Level 3: 150% Attack range. Dropped by: White Boss Roundhead Mushroom (Mist Grove 1)
  • Level 4: 200% Attack range. Dropped by: Yellow Boss Vampire Eel (Beach 3)
  • Level 5: 300% Attack range. Dropped by: White Boss Vampire Tree (Snowfield 5)
  • Composition restriction: Gloves, Whips
  • Effect explanation: Increases the hitbox of the gloves or the tip of the whip. It also enlarges the size of the glove or the head of the whip from 3x3 to 5x5 regardless of the card level.

Knockback's Card
  • Level 1: 25% chance of Knockback 20. Dropped by: Orange Boss Skull Bat (Hill Country 2)
  • Level 2: 50% chance of Knockback 20. Dropped by: Grey Boss Roundhead Snake (Seaside 2)
  • Level 3: 50% chance of Knockback 30. Dropped by: Pink Boss Gel Spider (???)
  • Level 4: 100% chance of Knockback 30. Dropped by: Red Boss Box Tree (Desert 8)
  • Level 5: 30% chance of Knockback 90. Dropped by: Orange Boss Castle Stickman (Snowfield 6)
  • Composition restriction: Gloves, Bows, Orbs, Guns, Whips
  • Effect explanation: Has a chance to make all projectiles in a character's shot knock an enemy away on impact. The strength of the knockback depends on card level.
  • Note: Larger enemies are less affected by the knockback effect and immobile enemies only shake in position when the effect is executed on them. Evidently, this card has actually existed for quite some time, but was not implemented until much later, in ver 12.1. Doing the math indicates that the level 4 version is just slightly better on average than the level 5 version at delivering Knockback; '90/100=0.9*30=27', '30/100=0.3*100=30'. The level 5 version may still be desired for certain weapons because it delivers more Knockback in a single activation, however. If the attack has a freeze effect, knockback is applies after the freeze wears off. Even if the attack does splash damage, only the 'primary target' will be knocked back.

Reflection Card
  • Level 1: 25% chance of Reflection. Dropped by: White Boss Smiley Fish (Lake)
  • Level 2: 50% chance of Reflection. Dropped by: Tan Boss Star Stickman (Seaside 4)
  • Level 3: 75% chance of Reflection. Dropped by: Yellow Boss Vampire Eel (Beach 3)
  • Level 4: 100% chance of Reflection. Dropped by: Yellow Boss Gel Tree (Snowfield 8)
  • Composition restriction: Bows, Orbs, Guns, Whips or Rings
  • Effect explanation: Allows the projectiles to bounce off terrain.
  • Note: This card is implemented in 12.8. It has a chance to allow all projectiles in a single attack to bounce off terrain. It has no effect if the projectiles penetrate through terrain. Reflection Card 4 will effectively allow projectiles from some weapons, such as Quad Steel Arrow, to travel from one end of the screen to the other end. The Whipper can use Reflection's Card, but not Pierce's Card.

Katana's Card
  • Level 6: AT +40%, +10 sword length. Dropped by: Green Boss Gel Bouncer (Forest 4)
  • Level 7: AT +50%, +10 sword length. Dropped by: Yellow Boss Coconut Walker (Inferno 2)
  • Composition restriction: Swords
  • Effect explanation: Increases both the base AT and the length of the sword.
  • Note: Is essentially a combination (as well as a level sum) of the Long Sword's Card 3 and Yellow Crystal 3/4 into a single compo item. Equipping this with a Long Sword's Card will increase the sword length by the sum of increments from both cards.

Heal's Card
  • Level 1: Heal to attack each +1. Dropped by: Grey Boss Triangle Walker (Hell 1)
  • Level 2: Heal to attack each +2. Dropped by: Grey Boss Triangle Walker (Hell 1)
  • Composition restriction: no restrictions
  • Effect explanation: This card heals the character by the specified LP at each attack. For the Angel, each hit by the rings heals the Angel. For the Priest, all other characters will be healed instead.

Ring's Card
  • Level 1: Ring +1. Dropped by: Orange Boss Skull Dragon (Grassland 3)
  • Level 2: Ring +1, LP +50. Dropped by: Purple Boss Cap Mushroom (Forest 2)
  • Level 3: Ring +1, LP +100. Dropped by: Red Boss Gel Tree (Submarine 2)
  • Level 4: Ring +1, LP +150. Dropped by: White Boss Vampire Fish (Beach 1)
  • Level 5: Ring +1, LP +200. Dropped by: White Boss Castle Dragon (Snowfield 3)
  • Level 6: Ring +1, LP +300. Dropped by: Yellow Boss Coconut Wheel (Forest 3)
  • Composition restriction: Rings
  • Effect explanation: Gives an extra ring to the Angel, which also allows the Angel to surpASS the original maximum Ring limit of 5 from DEX investments. At LV2 or higher it also gives an LP boost. This card can be considered a fusion of the Angel's DEX (or a Green Stone) and a White Stone.

Vampire's Card
  • Level 1: 3% LP recovery per damage. Dropped by: Castle Boss (Castle)
  • Level 3: 4% LP recovery per damage. Dropped by: Submarine Shrine Boss (Submarine Shrine)
  • Level 4: 5% LP recovery per damage. Dropped by: Pyramid Boss (Pyramid)
  • Composition restriction: Gloves, Swords or Whips
  • Effect explanation: Every time the character swings his weapon and hit enemies, the character regains an amount of LP EQUAL TO 3%, 4% or 5% of the total direct damage dealt in that blow, rounded down. This value cannot go below 1. Magical attacks do not trigger LP recovery.
  • Note: The healing effect stacks with the Critical's Card. The most effective weapons to use with this compo item are weapons which create a lot of separate hits. These can either be weapons with a very high attack speed (for instance the Mach Punch or Sonic Punch) or weapons that deal a lot of damage to a fairly large area, such as swords. When attacking large clusters of enemies with this compo item attached to a sword, maximum LP recovery may happen. Combining Sonic Knuckle, or any sword, Vampire's Card 4 and Quick's Card 4 will, in big clusters, result in rapid LP recovery (depending on the setup used, it may be that ONIGIRI's Card is superior to this). This card does not have a level 2. Interestingly, the level 3 version of this card sells for the same amount as a level 2 card and the level 4 card sells for as much as a level 3 card. As of ver 14.4, it has undergone a nerf where it would heal at lesser percentage (formerly 3%, 5%, and 8% for levels 1, 3, and 4 respectively). The description also changed from 'per hit' to 'per damage' in ver 14.4, possibly to avoid misinterpretation although this has not changed the card other than the ratio.

ONIGIRI's Card
  • Level 1: 5% chance of ONIGIRI drop per hit. Dropped by: Castle Boss (Castle)
  • Composition restriction: Gloves, Swords or Whips
  • Effect explanation: Every time the character hits an enemy, there is a 5% chance an onigiri drops. Magical attacks do not trigger the onigiri drop.
  • Note: This is a rare card, but it can provide a lot of onigiris for the whole team. Sells for twice the price (1000$) of other level 1 cards except the Gold Rush Card. The most effective weapons to use with this compo item are weapons which create a lot of separate hits. This can either be weapons with a very high attack speed (for instance the Mach Punch or Sonic Punch) or weapons that deal a lot of damage to a fairly large area, such as swords. When attacking large clusters of enemies with this compo item attached to a sword, whip, or glove, a huge number of onigiri may drop. This card does not work in VS, and defeating an enemy character will not trigger the onigiri drop at all. Depending on the setup, the Vampire's Card may be a better choice. The Silver Medal is a potential alternative to the ONIGIRI's Card, particularly if a party has no Gladiators, Boxers, or Whippers.

Gold rush Card
  • Level 1: 5% chance of GOLD drop per hit. Dropped by: Submarine Shrine Boss (Submarine Shrine)
  • Composition restriction: Gloves, Swords or Whips
  • Effect explanation: Every time the player hits an enemy, there is a 5% chance that Gold drops. Magical attacks do not trigger the gold drop.
  • Note: The amount of money correlates with the damage done to the enemies. In addition, hitting several enemies results in higher money values, making this card especially compatible with weapons which deals splash damage as primary attacks, such as whips and the Sonic Cestus. The amount of money is also influenced by the Gold Medals, which can result in even higher gold drop amounts.

Zombie's Card
  • Level 4: +50% LP, -100% fire damage. Dropped by: Pyramid Boss (Pyramid)
  • Composition restriction: no restrictions
  • Effect explanation: This card multiplies the character's LP by 1.5x, but that character will receive twice the damage from fire attacks. Note that the LP increments from White Stones can be multiplied with this card but not the LP increments from the Ring's Card. It also turns the character into a zombie (purple body with a white box head) and surrounds it in more shade than a regular stickman (more noticeable when underwater).
  • Note: This is also the first card to go straight to Level 4 without having levels 1, 2 or 3 before it. It cannot be bought in the Village due to its LV. This card was misnamed 'Zombi's Card' when it was implemented in V8.2, and was fixed in V8.3.
 
Added: 26 Oct 2024 - Released: 18 Jul 2008 (ha55ii - dan-ball)
Copyright © 2011-2026 hackahobo.info